Issue
I bought this notebook for a repair and resale. When I asked a seller about the laptop’s history, his reply was “It just stopped working”. As it later turned out, it had numerous problems, one of them being a faulty webcam. After the Northbridge chip replacement the laptop started working. During a testing process, I noticed the webcam isn’t working in Skype; there was no video and the webcam’s control light wasn’t lit. In the Device manager there should be a HP webcam-101 device under the imaging devices or at least an unknown device with an exclamation mark beside it (a possible driver issue).
Webcam’s absence in the device manager points to a hardware failure. There are four possible scenarios in cases like this, written from the most likely to less:
- A faulty webcam module
- A damaged cable connecting the webcam to the motherboard
- A webcam cable was disconnected from one of two connectors 1 2
- Micro-cracks in solder balls connecting the Southbridge chip to the motherboard as a result of a mechanical shock
Each of the first three faults can easily be diagnosed and repaired with the help from this guide. As for the Southbridge chip failure, a technician would need a BGA rework station and a great deal of BGA chip soldering skills, since the SB chip needs to be removed and replaced. Luckily the Southbridge chip failure is fairly easy to diagnose, because the webcam is just one of many devices that communicate through the SB chip, as noted from the HP G62 block diagram below. If USB ports, Hard Disk, CD-ROM drive, Sound, Bluetooth and WLAN all work without a problem, we can safely assume the failure isn’t with the Southbridge chip.

Tools required for the repair:
- Phillips screwdriver size #1
- Sharp ESD safe tweezers or a similar sharp tool
- Flat ESD safe (antistatic) tweezers or a similar tool
- Plastic opening (pry) tool
- Digital multimeter (not needed if replacing the webcam)
- Anti-static (ESD) wrist strap (not essential)
- A working HP G62 C62 Webcam (Only needed if the current one is faulty; please note the product number written on the current webcam module to ensure compatibility before ordering)
Procedure
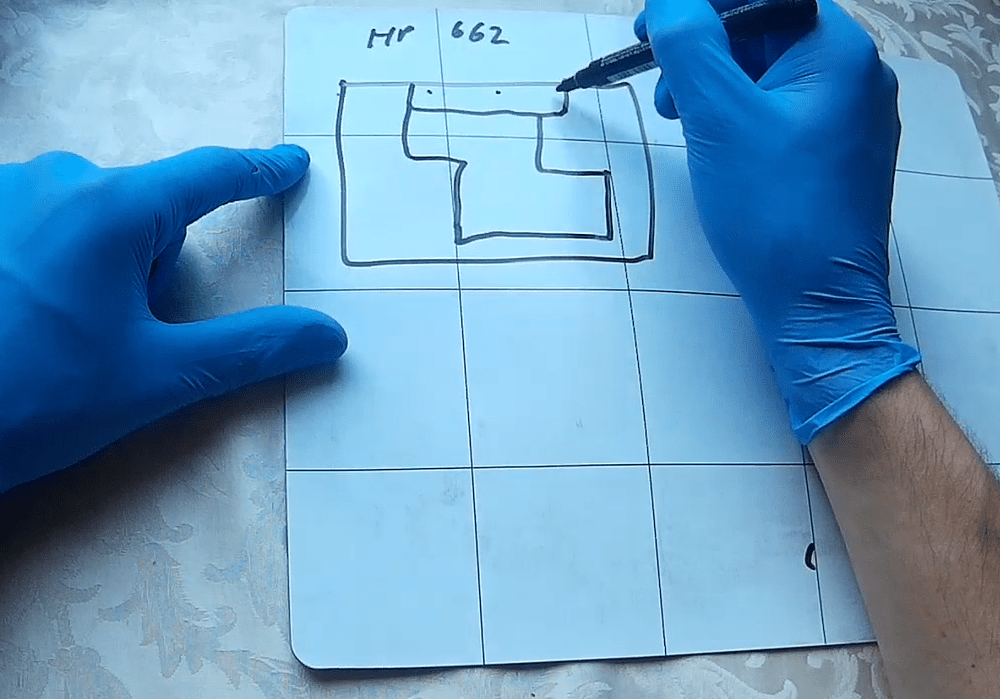
I like to start a notebook dis-assembly process by sketching an outline of the notebook on a piece of paper or on a magnetic board. For every screw hole I draw a dot. During the dis-assembly process I put every screw to its respective place on the paper. This speeds up the reassembly process considerably, since I don’t need to figure out which screw goes where. The whole process is really worry free, because it’s impossible to pierce the casing by using a screw of wrong length.
Remove the battery and the charger before opening the laptop. For extra safety, after removing all the sources of power, press and hold the power button for 20 seconds to drain the remaining electricity from the motherboard and other components. Now it’s time to ground yourself with an Anti-static (ESD) wrist strap, if you have one, to prevent the damage caused by electrostatic discharge when touching sensitive internal components.
Remove all the bottom casing screws along with two panels or covers. Remove the WLAN card (note the connecting cables, numbered 1 and 2), RAM sticks, Hard drive and Optical drive.

Keyboard removal is the most difficult part of the dis-assembly process since it requires a lot of patience. Inexperienced people often damage the keyboard or surrounding casing by utilizing sharp objects during the removal. Keyboard has a few small “locks” that need to be released in order to remove it. Use one of the plastic opening (pry) tools or a flat tweezers to release the locks and at the same time lift the keyboard a bit, after every released lock. If you do not feel confident enough doing this, google up more information on this procedure before trying.
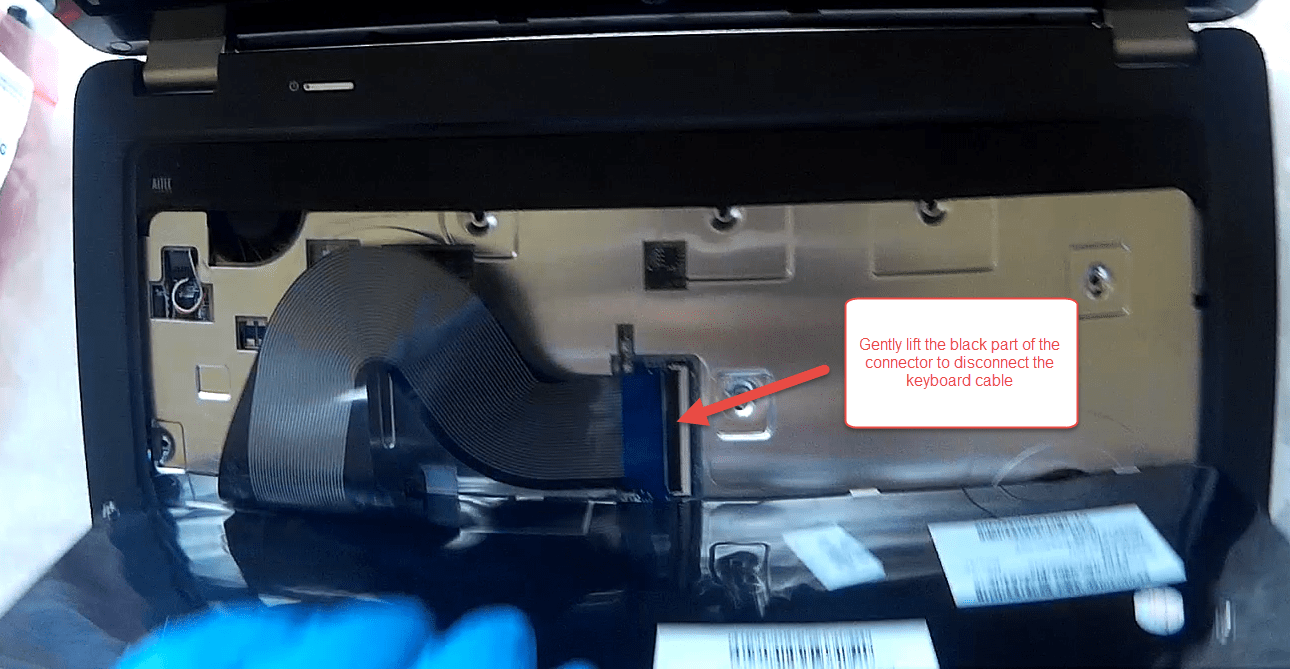
After lifting up the keyboard, remove the fragile keyboard cable from the motherboard connector by gently lifting up the black part of the connector thus releasing the keyboard cable.
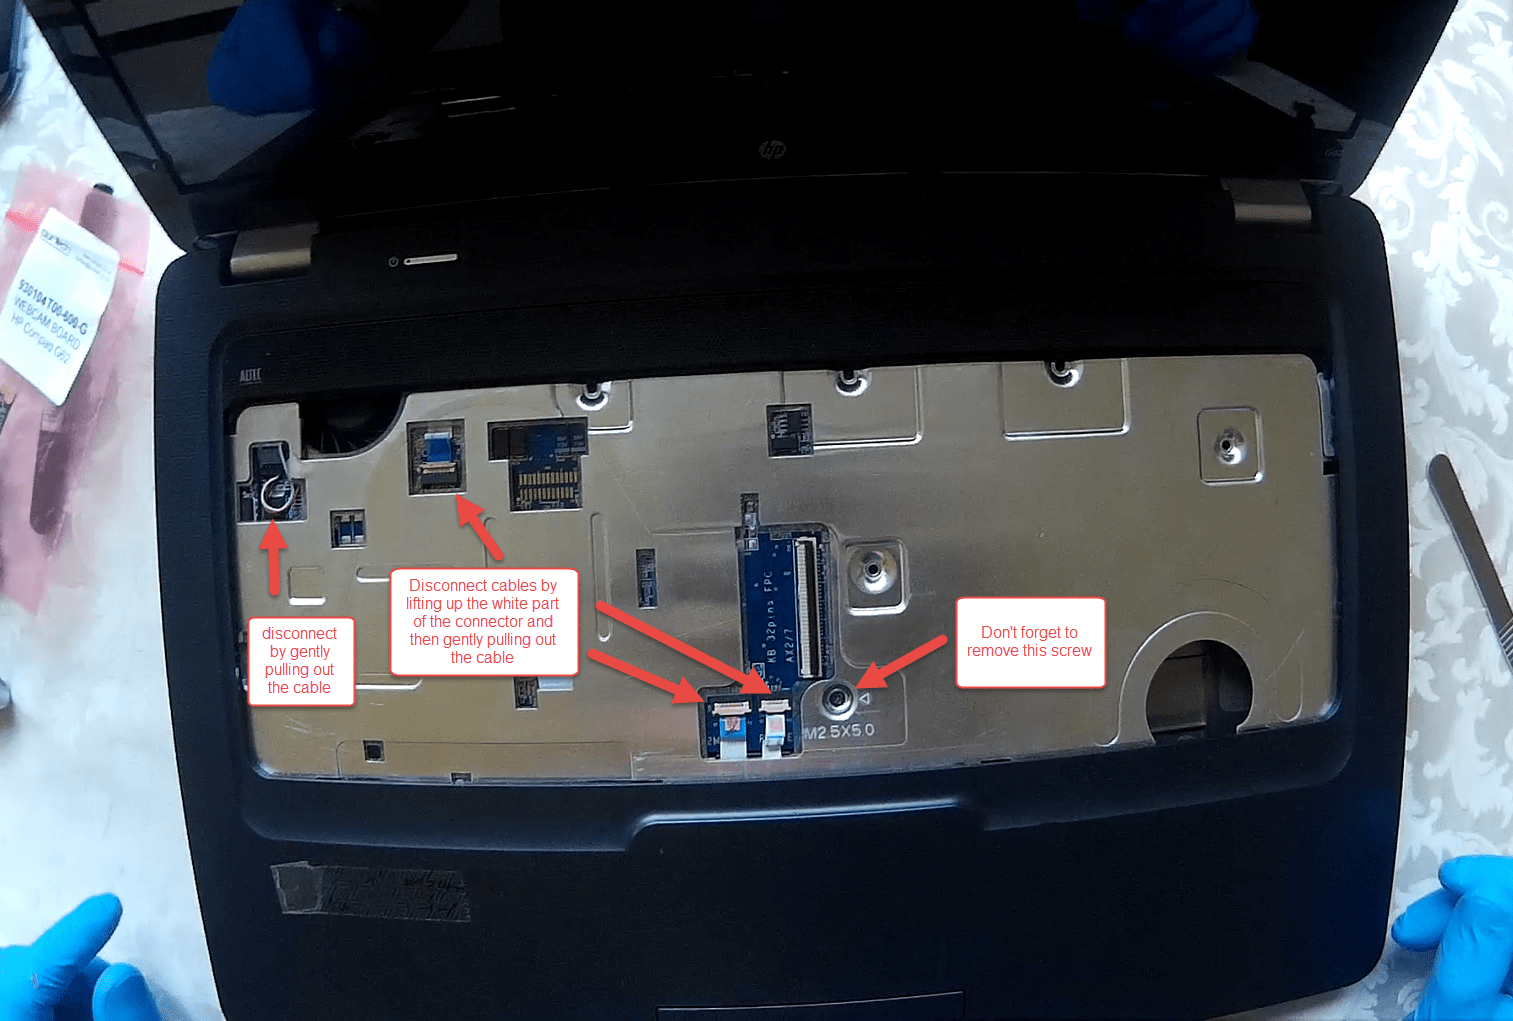
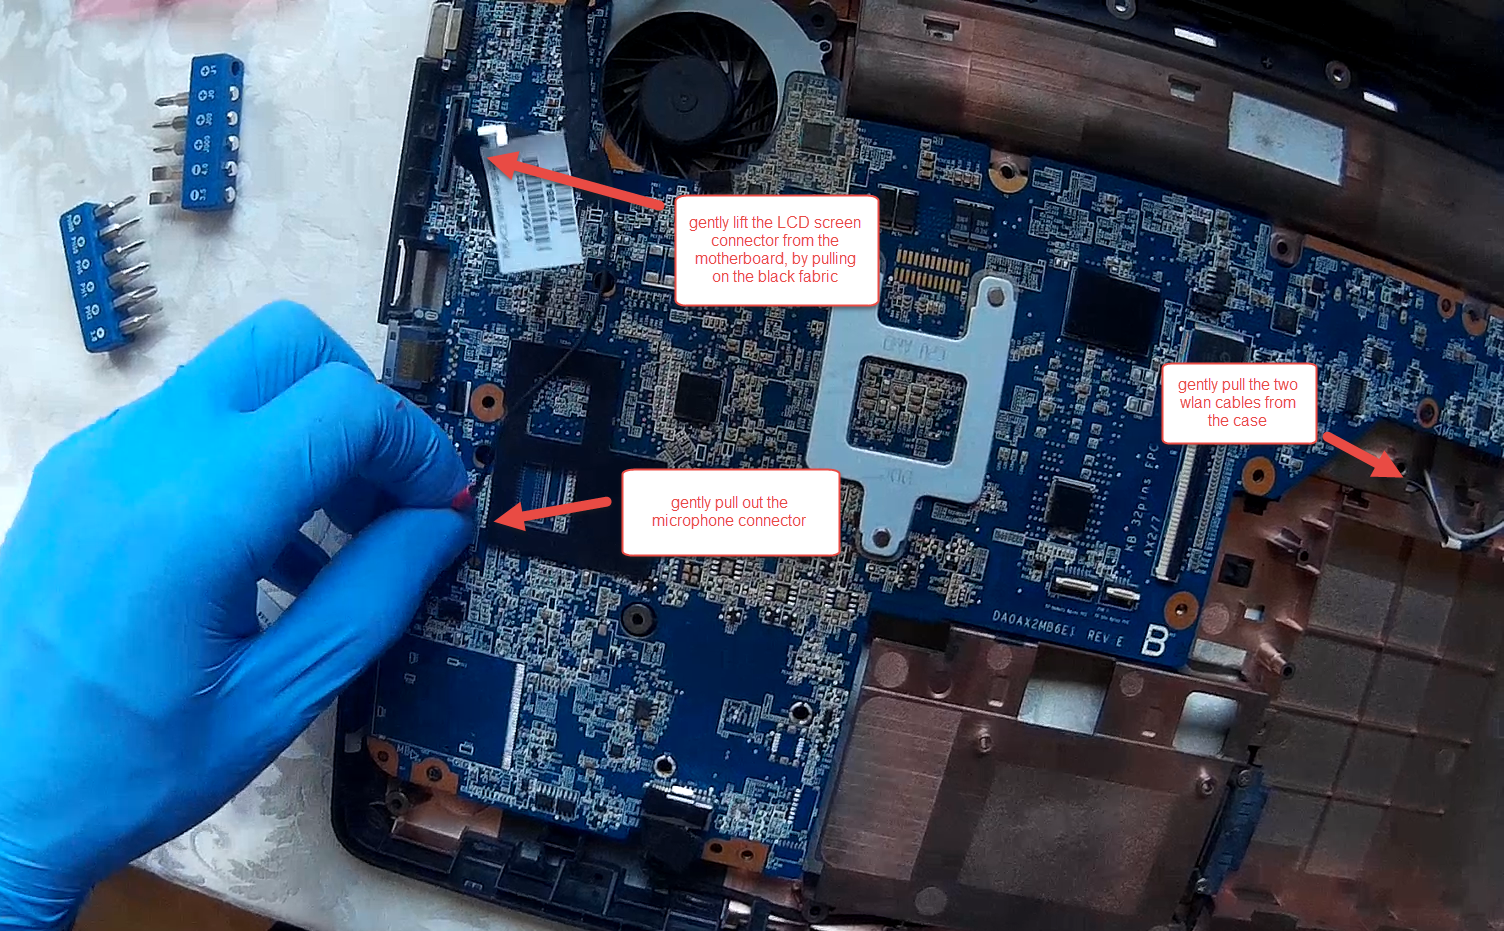
Before removing the notebook’s upper case, we need to release four cables and a screw, as shown in the picture below.
To separate the upper case from the bottom one, it’s best to use an old credit card or a guitar pick. Avoid using any kind of non-plastic tools, like flat head screw driver, as this would damage the plastic casing. Slide the plastic pry tool of your choice, along the channel between the upper and bottom case, as shown in the picture below. This will require several tries, you will hear clicking sound from the plastic locks releasing. Patience is key here, take your time and do not force the separation as this would lead to broken plastic locks. Some parts, like the front side of the case below the screen, are inaccessible by the plastic pry tool. You will need to release those by hand after all the other parts are released.
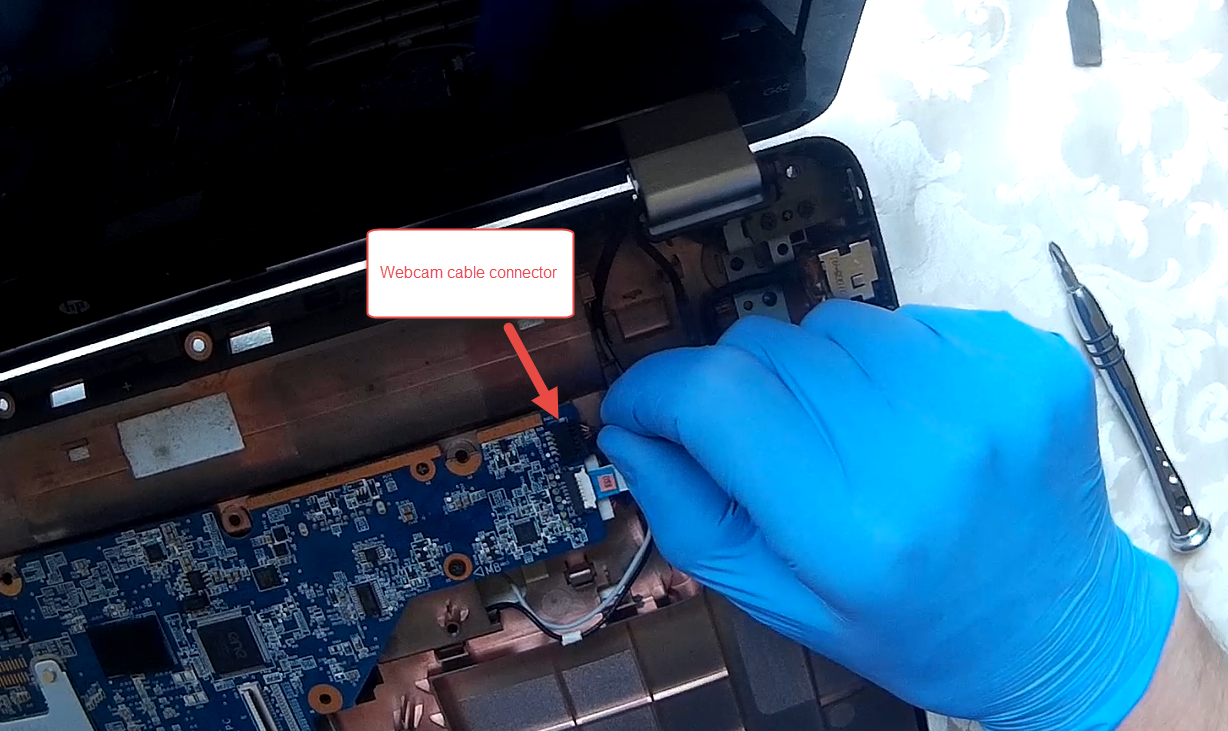
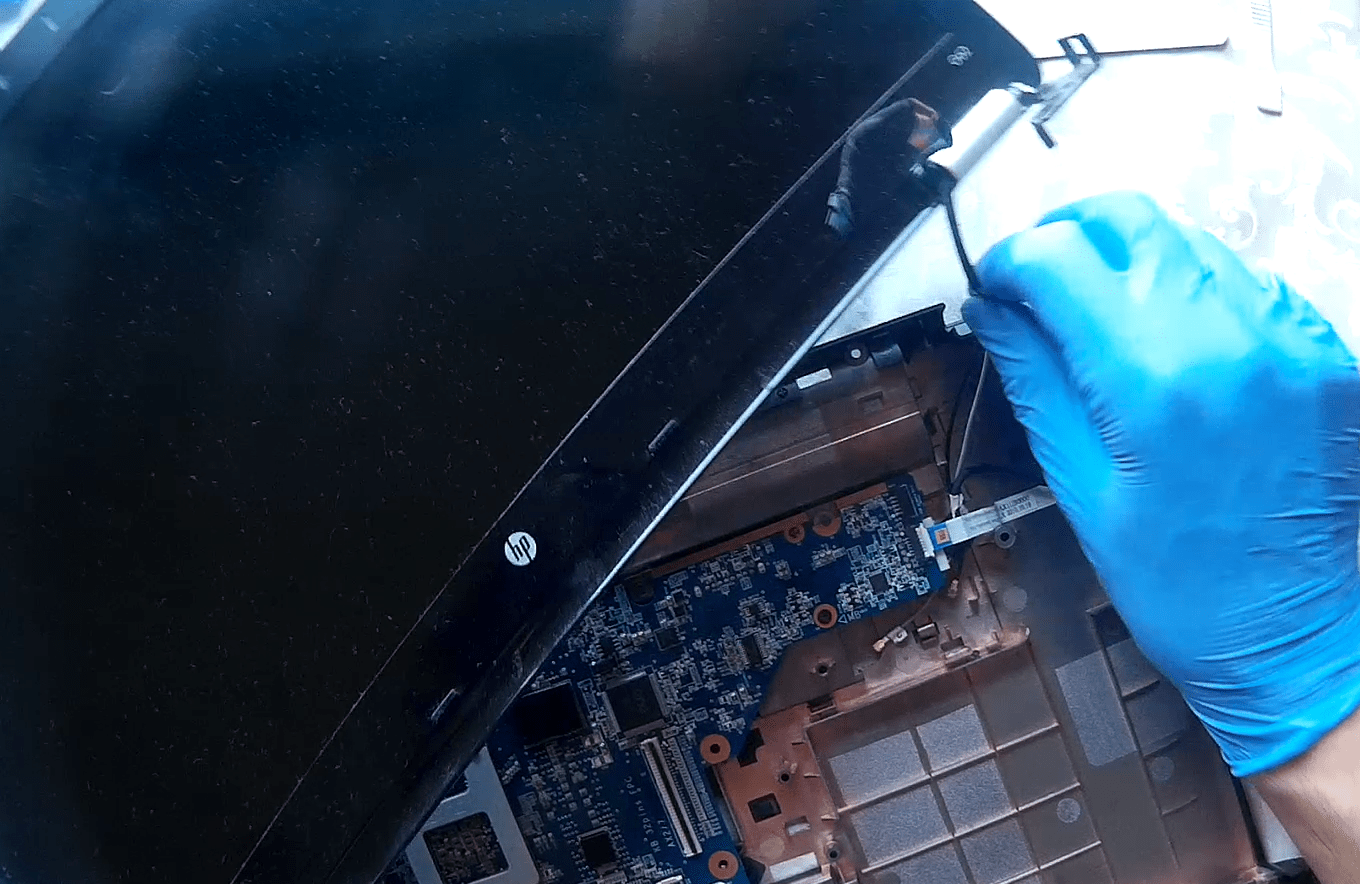
In order to remove the screen, first we need to remove five cables which are connecting the components in the screen assembly to the motherboard, as shown in the picture below.
Note: Inspect the webcam’s connector before removing it, if it’s not fully inserted into the slot on the motherboard, we have found the culprit. If this is the case, re-insert the webcam’s connector, reassemble the laptop and test the webcam. Otherwise continue to the next step.
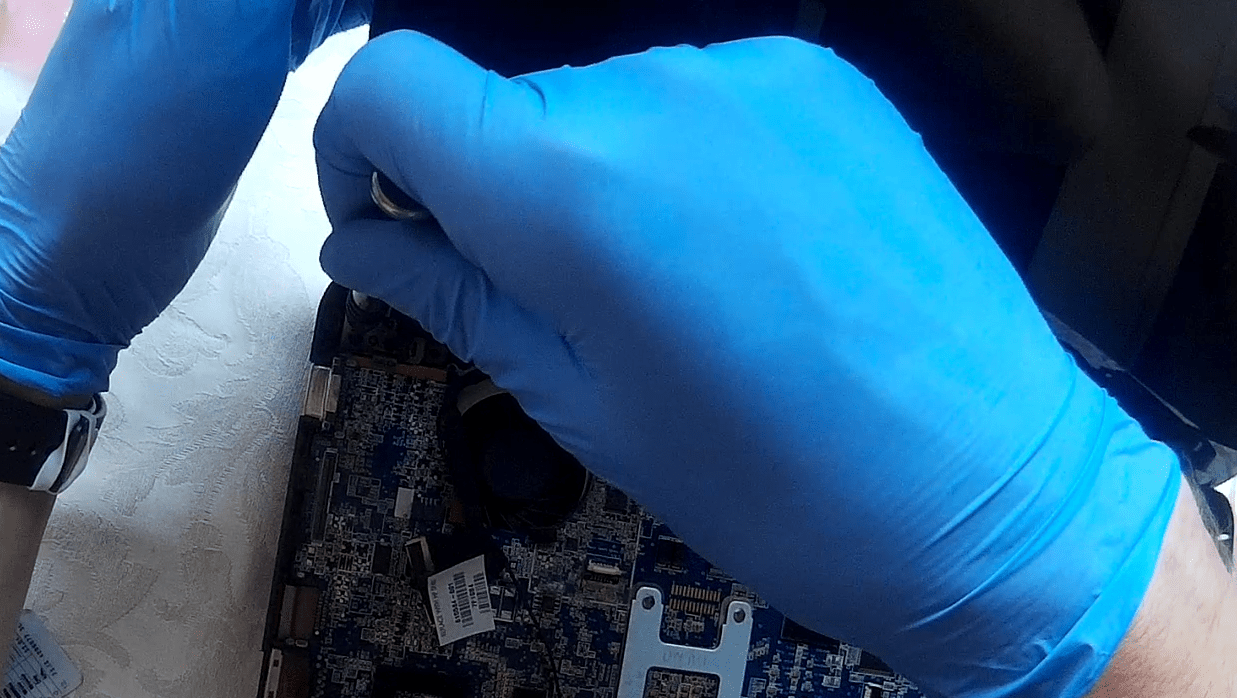
Remove two screws on each of the two screen’s hinges and gently lift the LCD screen assembly from the bottom case. Carefully pull the WLAN cables, to remove them from the bottom case.
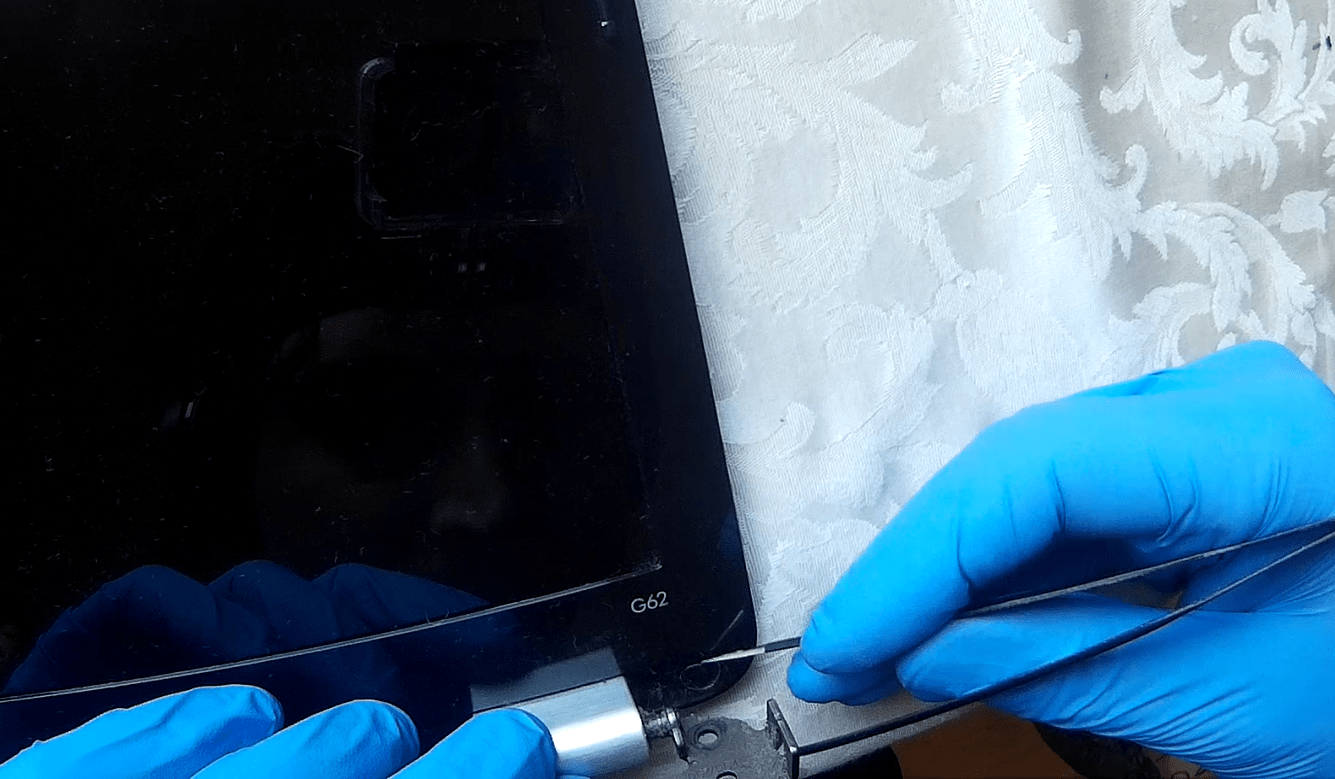
To open the LCD screen assembly, we need to locate two black circles, one near the bottom left corner of the screen’s bezel and other on the bottom right. Take the Sharp tweezers or a similar sharp tool and carefully remove the two circles (screw covers), they are glued to the screws below. Put them in a safe place, we will re-use them when reassembling the screen. Remove the two exposed screws.
Take an old credit card or a guitar pick and slide it along the channel between the screen’s bezel and screen’s back cover, thus releasing the plastic locks holding the two pieces together. This will require several tries, you will hear clicking sound from the plastic locks releasing. Again, patience is key here, take your time and do not force the separation as this would lead to broken plastic locks.
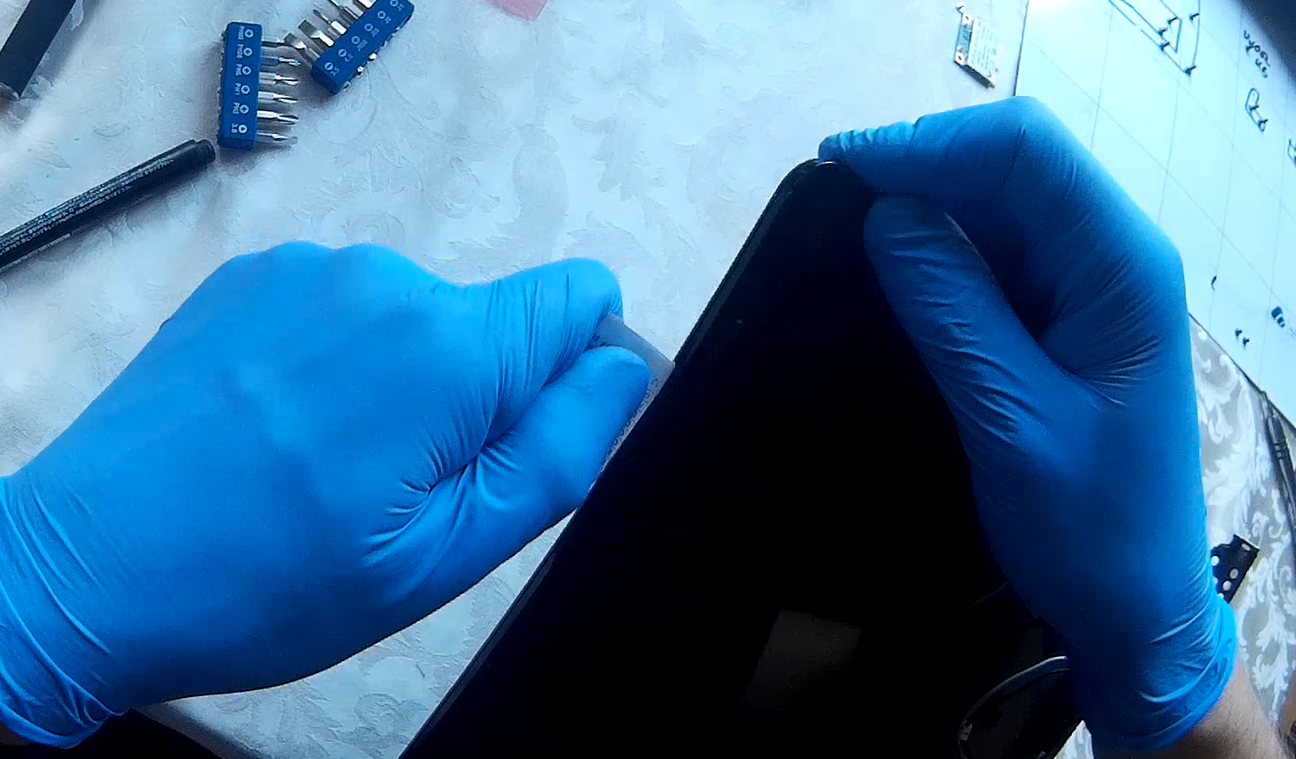
Although all the plastic locks are released, you will not be able to separate the screen’s bezel from the screen’s back cover, since the bezel’s bottom part is glued directly to the LCD panel with a double sided adhesive. To release the bond between the two, do not use any objects, not even the plastic ones, as this would surely damage the fragile LCD panel. You will need to release the bond with your hand (be careful if you have longer nails) by gently prying it upwards from one side to the other, as shown in the picture below. Take your time and exercise patience.
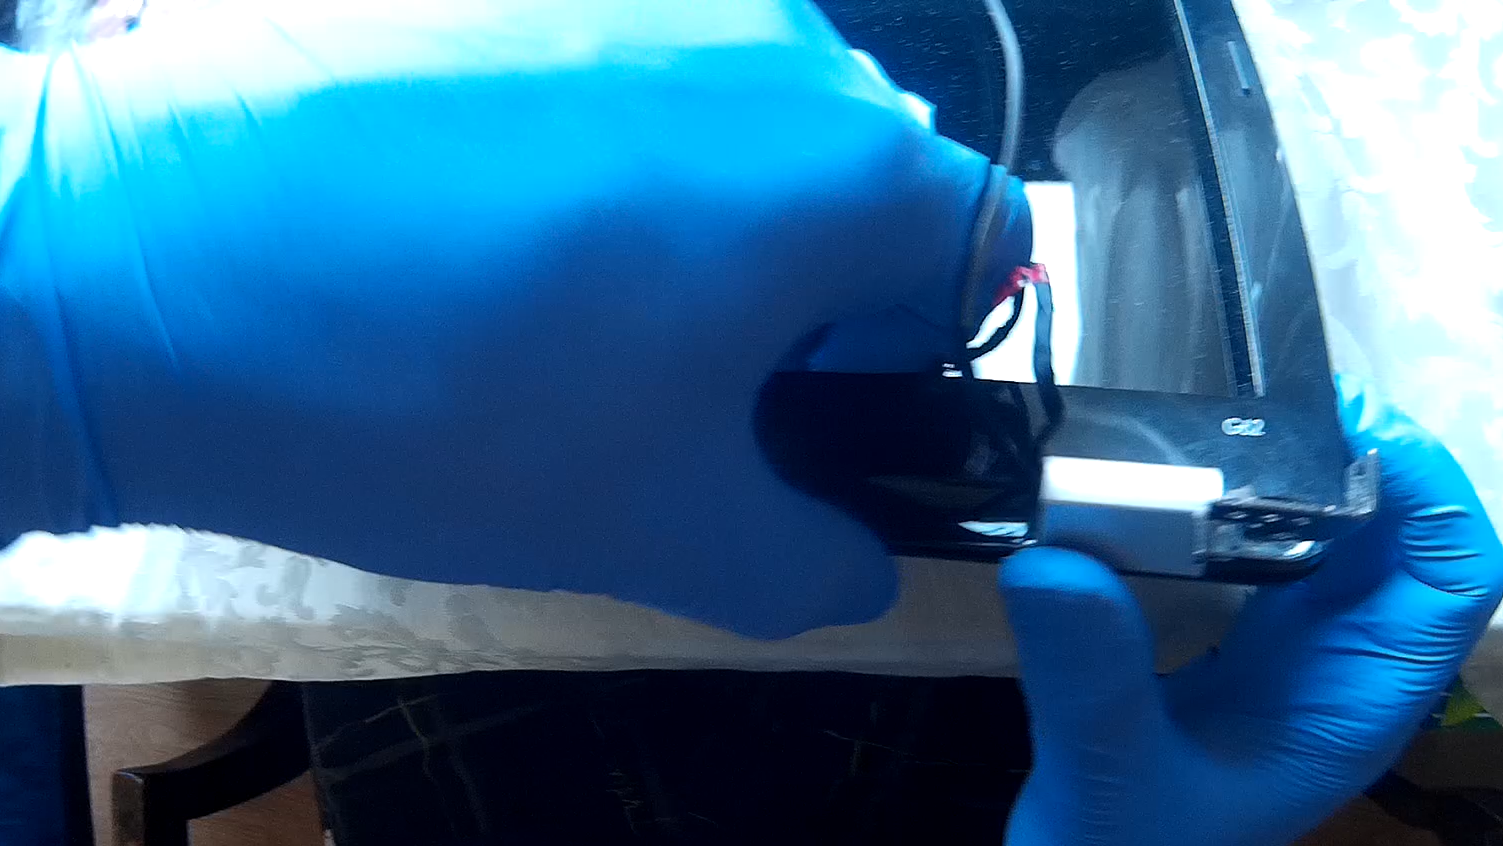
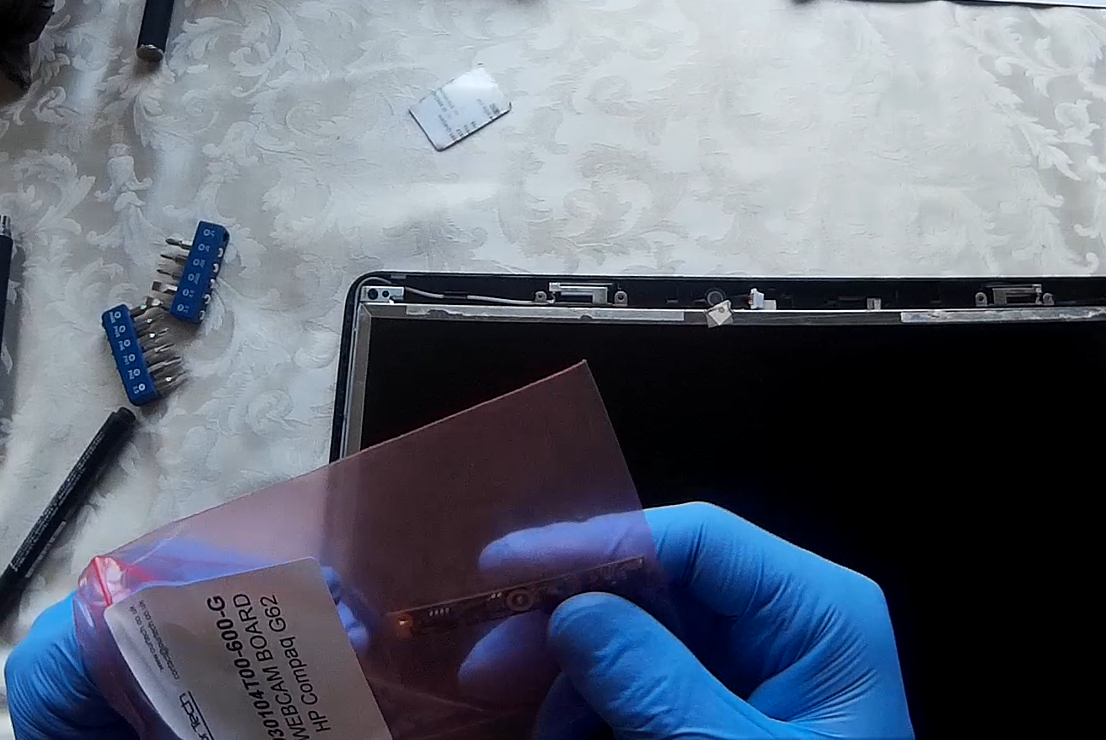
First we visually inspect the webcam’s cable connector. If it’s fully seated into the slot on the webcam module like the one in the picture below, we can eliminate “dislodged webcam connector” as the source of our problem.

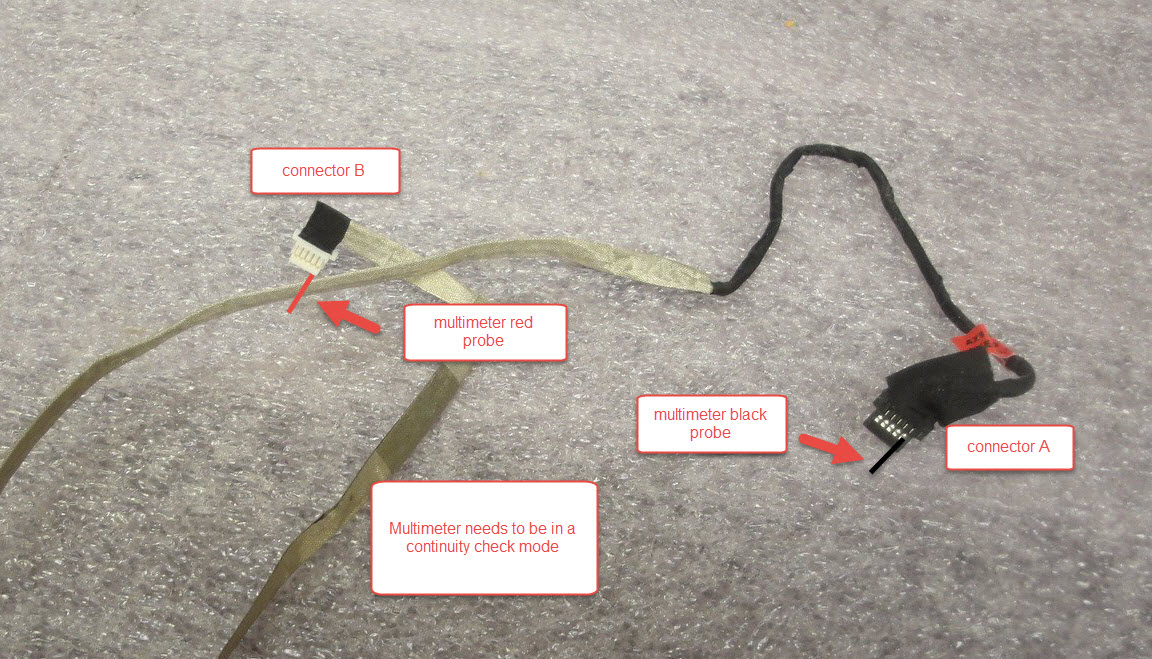
Webcam’s cable is essentially made from five thin cables, wrapped around with a tape and soldered to the connector on each end. Each of the connector’s pins represent one cable.
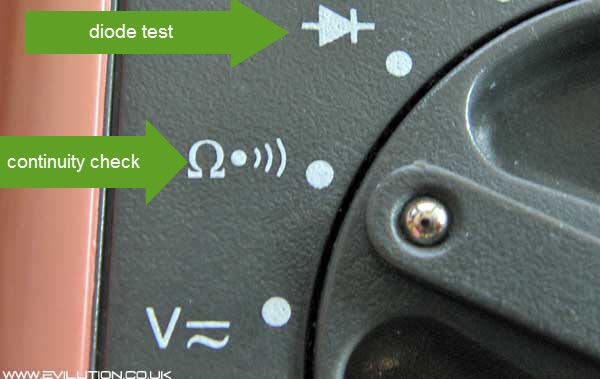
To check the webcam’s cable, you will need a digital multimeter. Put your multimeter in a continuity check mode, as shown in the picture below.
For the clarification purpose, we will name the two connectors; connector A and connector B. Put one multimeter probe (doesn’t matter which one) on the first exposed pin on the connector A and at the same time with the other multimeter probe, touch every pin on the connector B. You should get 0 – 1 ohm reading on your multimeter each time you touch the pin which is connected to the pin on the other end. Multimeter should read OL or “open line” for all the other pins, which are not connected by the same cable. Now move the first multimeter probe to the second exposed pin on the connector A and with the other multimeter probe, touch every pin on the connector B. The result should be the same as the first time, one 0 – 1 ohm reading on your multimeter and four OL readings. Repeat the procedure on all of the remaining pins. If you get one 0 – 1 ohm reading for each pin tested, the cable is OK. If you get five OL readings on a certain pin, you can be sure the webcam’s cable is faulty. It needs to be replaced, since one of its cables is ripped somewhere along the line and isn’t conducting as it should be.
Solution
On the laptop mentioned above, the webcam’s cable passed the continuity test, also the connectors on both sides of the cable were fully inserted into the motherboard’s slots. All other devices connected to the Southbridge were working as expected, except for the webcam. With that in mind, I ordered a replacement HP G62 webcam board from Ebay, connected it and reassembled the laptop. Of course the new webcam immediately appeared in the Device manager under the Imaging devices as the HP Webcam-101. I tested it with the Skype, the webcam’s control light appeared and so did the video feed.
Word of caution
Electronics repair is not difficult but it requires a lot of patience, calmness, focus, a steady hand and some common sense. When in doubt or when you do not fully understand something, educate yourself first by googling, before following the step in question. If you do not feel competent enough to follow a given procedure it is best to seek help from an expert technician in your area. I cannot be held responsible for any damage caused to yourself, your equipment or to the device you are repairing as a result of following this tutorial.
If you have found this blog post useful and would like to buy me a cup of coffee, please click here :)